sa

Dresses from Shabby Apple
Showing posts with label Easter. Show all posts

Monday, April 9, 2012

Easter Weekend Recap

Happy Monday y'all!

I hope everyone had a great Easter weekend!
I know I did :)

Miscellany Monday @
lowercase letters

{Thursday}

On Thursday night Chris and I dyed Easter eggs!
We had so much fun.
I love having the eggs around this time of year because I love to make egg salad.
I will admit that I normally soak a few that are cracked in the blue or green dye for a long time so that I can have egg salad that has colors in it ;)
I don't know why I like doing that, but I do!


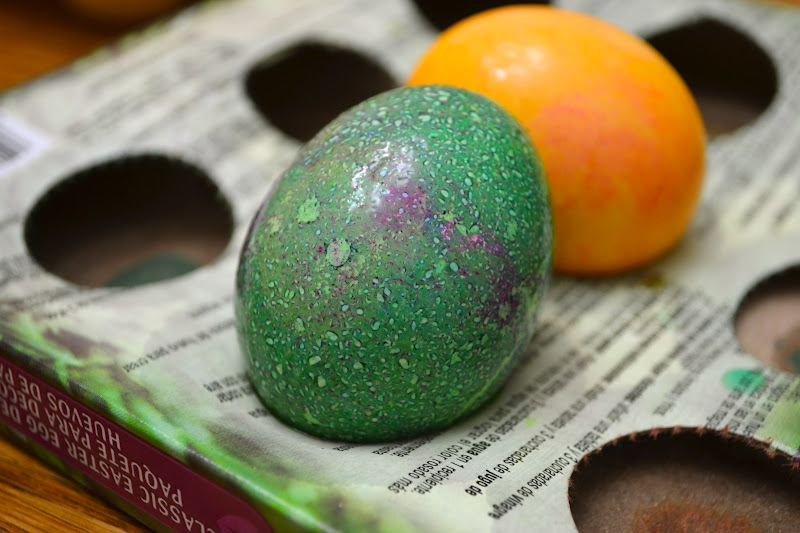

Chris always has to take one egg and make sure it goes through all 12 of the dye colors.
He calls it the speckled egg!!


{Friday}


On Friday Chris and I drove down to Charleston.

My home church puts on a play every year at Easter called the Passion Play.
This year was the 25th annual Passion Play and the last year they will be doing the play.
I really wanted to see it for the last year so Friday night Chris, my sister, and I went to see it.


(That soldier to the right there is my dad!)
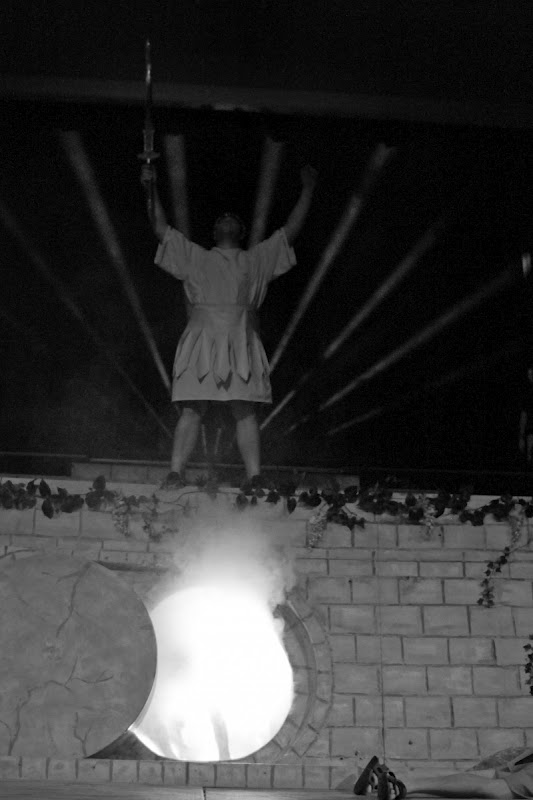

We had a really good time!
The performance is always really good.


{Saturday}


On Saturday my sister and I woke up and dyed more Easter eggs.


Then my dad sent my mom, my sister, and I out shopping for Easter dresses!
Since Chris lost his job I didn't really expect to get a dress this year so I was really excited!
I ended up getting the very first dress I tried on at Dress Barn.
Have you ever shopped there?
They have a huge selection for a really great price.
My dress was a third of the price I would have paid for it somewhere else.

This is the dress I ended up getting:


We ate at Moe's for lunch, and Saturday night we had pizza for dinner and watched The Ten Commandments on television.
The Ten Commandments is an Easter tradition for my family!


{Sunday}


On Sunday we went to Easter service, and then came home to a big lunch prepared by my mom.
My neighbors who I consider my grandparents came, and my aunt and uncle were also there.
It was a great day with family!

We took lots of pictures with everyone dressed up.
Allie was in her Easter dress and Pinto Bean, D'Artagnan, and Thomas were all in their bow ties :)


It just so happened that D'Artagnan's bow tie matched Chris, and Pinto Bean's bow tie matched me!


The cupcakes and cake my mom made!


I hope everyone had a great Easter weekend as well and that everyone's week is off to a great start!

Sunday, April 8, 2012

Happy Easter!


"'Do not be afraid, for I know that you are looking for Jesus, who was crucified.  He is not here; he has risen, just as he said.'"
Matthew 28:5-6 (NIV)


Friday, April 6, 2012

DIY Bow Tie Tutorial

About a week ago I decided to make bow ties for my dog and cats for Easter this year.

They turned out really cute, and they were super easy to make!
This was actually my first EVER sewing attempt, and I'm proud to say that I made it through :)

So I thought I'd share with you how to make your own bow ties for your human or fur babies!


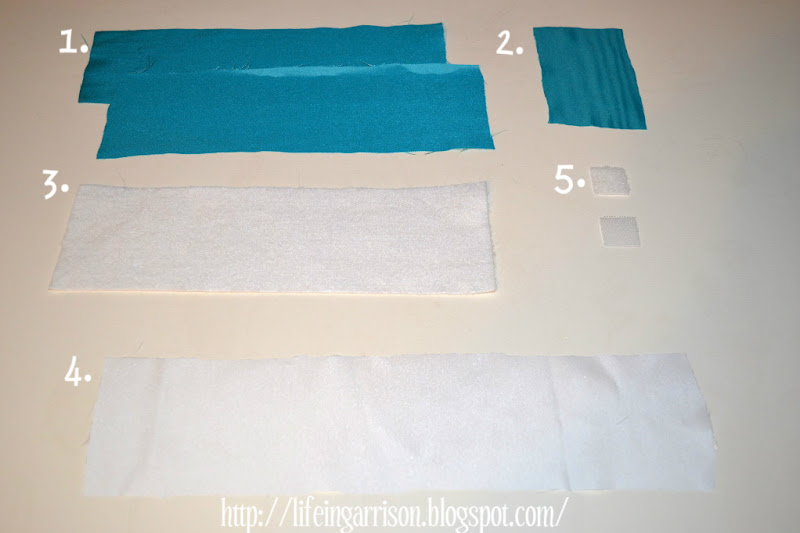
Here's what you'll need:


1. Two 3" x 10" pieces of solid color/patterned fabric.  This will be the actual bow tie.

2. One 2.5" x 4" piece of matching solid color/patterned fabric.

3. One 3" x 10" piece of felt.

4. One pice of 3" x _ _ " piece of matching solid color/patterned fabric OR white fabric
I chose white fabric.
This will be the neck strap, and I will tell you how to measure this in a minute.

5. Piece of 1" x 1" square of velcro.


To get the measurement for the length of the neck strap:
-If you are making this bow tie for a child, they need to be wearing the shirt that they will wear the bow tie with.  Raise the collar and measure around the neck.
-If you are making this bow tie for a dog, simply measure them around the neck, or measure the length of the collar.
ONCE YOU HAVE YOUR MEASUREMENT, ADD 2" FOR THE LENGTH OF THE FABRIC.
(so if you measured your child's neck at 13", the fabric needs to be 3" x 15")


Take the two pieces of 3" x 10" fabric and place them "right" sides together.  Place them on top of the piece of 3" x 10" felt.
(The "right" side refers to the side that you would consider the front of the fabric.)


Sew around a 1/4" seam around the entire rectangle of fabric, leaving a gap about 2" wide at one end.
(The gap is indicated with the arrow.)
Trim corners.


At the gap, start to turn the fabric inside out.  Be sure you are turning between the two pieces of fabric so that the felt ends up on the inside between the two pieces of fabric.
I used scissors for this.
Now your rectangle will be right side out with the "right side of the fabric showing on either side.


Tucking in the unfinished edge, bring both ends together and sew them together in the middle.
I used a zig-zag stitch for this.


With the zig-zag portion you just sewed facing out, fold the rectangle in half long ways like the two pictures above show.


Sew an inch long seam about a 1/2" from the edge going through all the layers where the arrow is pointing.
This seam is running from my index finger to my thumb and crosses over the zig-zag stitch.
You may have to hand sew this.
This is to help hold the bow tie together before adding the middle strip of fabric.


When you get done, it should look like this.


Next, take your piece of fabric measuring 2.5" x 4" and fold it in half long ways so that the wrong side is showing and the right side in inside.
Sew a 1/4" seam down the length of the two free edges.


Turn the piece of fabric inside out so that the right side is on the outside again.


Squeeze the top and the bottom of the bow together to make your creases.
Then wrap the little piece of fabric you just sewed around the middle of the bow tie.
Hand sew the two free ends together in the back, making sure to tuck under the frayed ends.


Make your neck strap the same way as you did the little piece of fabric for the center of the bow tie.
Turn right side out.
Use your scissors to guide the neck strap through the middle of the bow tie.


Sew the pieces of velcro onto either end of the neck strap tucking under the frayed ends before you sew.
Make sure that the pieces of velcro are on opposite sides of the neck strap so they will fasten.
In my pictures, the hook and loop part is on the bottom side of the neck strap and the fuzzy part is on the top side of the neck strap.


And there you have it!
Cute bow ties for every occasion for children and dogs alike!

You do not need a sewing machine in order to make these.
In fact, the very first one I made I hand sewed.
Of course, the sewing machine makes it go faster, but it's not a hard or long project without it.

I used satin fabric, but you can use any kind you want.

Let me know if you have any questions, and let me know if you make any!

Happy crafting :)


This tutorial was adapted from the tutorial seen HERE.